Welcome to the Maker Lab, a small building across the street from the Hayden Library, commonly known around Tabor as Ashley House. Recently, it was turned into a fully functioning workspace for Tabor’s new Engineering program, as well as an awesome learning environment.
Before this past semester, the first of my senior year, I didn’t know a thing about electricity. If you had asked me what a photoresistor, Arduino, or soldering iron was, I would’ve stared at you blankly and probably, being my injury prone self, assumed they were all something that could either shock me or burn me.
However, within the first couple of weeks in Dr. Kistler’s Electrical Engineering Class, I knew how to blink an LED in various patterns and colors, wire a buzzer to play the theme from Mario Cart, and code and create my own thermostat, capable to control temperature with a heat lamp.
After the first couple of weeks passed by and we were taught about the beginnings of wiring, electrical design, and coding, we were given freedom to design and build our own project based on our own curiosities and interests. Initially, given this assignment, I was a bit lost. Even with the prerequisite skills under my belt, the thought of all of the options and the challenges that came with each was a bit overwhelming.
Dr. K, however, came to my rescue.
“Why don’t you put your musical skills to the test? Design a musical instrument.”
Within a couple of hours of research, I came across the design for a light sensed musical instrument called an “illumaphone.” The instrument consisted of six cups, wired up with light sensors called photoresistors. As the musician moves their hands over the tops of each cup, the photoresistors respond and play different musical notes at different volumes and vibrato levels, all depending on how much light each photoresistor picks up.
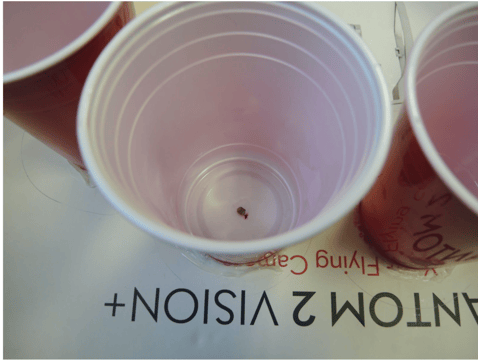 This is one of the tiny photoresistors that is in the bottom of each cup, the small devices in charge of sensing the light blocked by the hands over the cups while the instrument is played.
I also researched a design for an LED matrix digital display, in which the user can plug in an auxiliary cord to any music and have a spread of thirty-five LEDs light up and dance to the beats and volumes of the music.
My final proposal for the semester ended up being to combine and customize the operation of these two projects, so that I could play the electronic musical instrument and have the music that I make be displayed on the LED matrix. With a leap of faith and an order click on Amazon for all of the parts, I was off.
Beginning with some basic coding and programming on the “Arduino” board, the small electronic device that tells my creations how they should function, as well as some soldering of wires, I soon had created the basic wiring and functional coding for my project.
I was also able to have some fun with the physical build. To hide the wiring as to not distract from the sound or the display, I cut up an old box found in my basement, and attached my cups, and then drilled a block of wood with 35 holes and inserted the LEDs, attaching that to the front of the instrument. The final project looks like this:
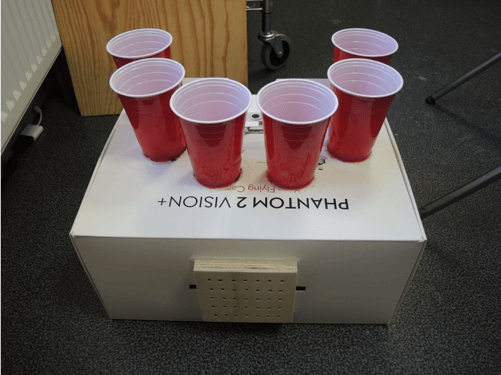 The outside...
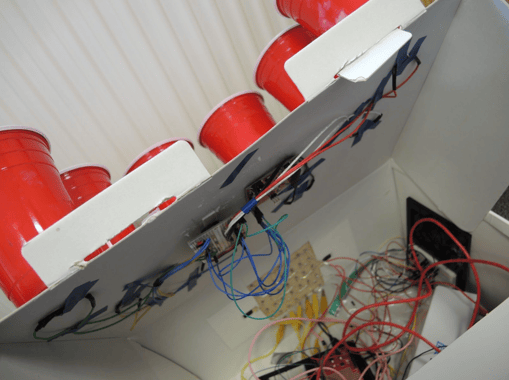 And the hidden, very wiry inside!
Testing each of these parts is, of course, difficult; there’s always things that can go wrong! However, Dr. K has made it one of the main goals of the course to teach us about problem solving and troubleshooting. If we run into a problem along the way, we have to explore the possibilities of where we could’ve gone wrong, and how we could fix it.
One of the main obstacles I ran into, personally, was the coding. Physical build was less challenging for me, because I am a sculptural artist outside of class. The coding, however, was completely new to me, and this project was especially ambitious because it required two different programs, one we had learned and one that was completely new to me. When the execution of the new one didn’t go as expected and didn’t seem to be showing signs of going anywhere, I came to quite the halt in my progress. However, after some research and troubleshooting, I eventually ended up working with the program I was familiar with to alter the project and rewrite all of the code in one place.
This class has been an awesome learning experience for me, not just because it has allowed me to explore my interests in a whole new way (electricity is so cool). It also has taught me the amazing skill of being okay with failure. I went into the class not knowing how to approach even the smallest electrical task, and came out with the acquisition of a rare knowledge of electricity and circuitry that not many high school students can say they have, and an awesome project. (That is very much still in the works!)
It is amazing what we can all learn by trying, failing, troubleshooting, and trying again. It has certainly taught me a lot, and given me an extremely valuable experience. And I can definitely say the same for my peers, as I look around me at all of the tables.
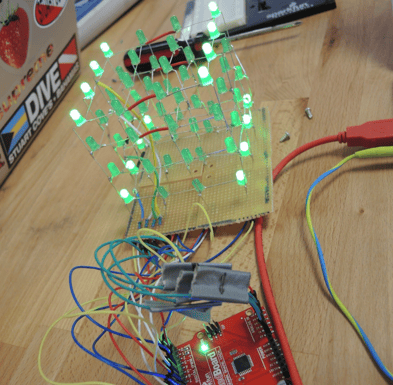
Henry Knoblauch, to my left, is in the process of making an LED cube with a laser cut casing that lights up in various patterns and speeds:
William Stewart, to my right, is designing, laser cutting, and wiring his own personalized miniature battlebot, with full mini battling capabilities:
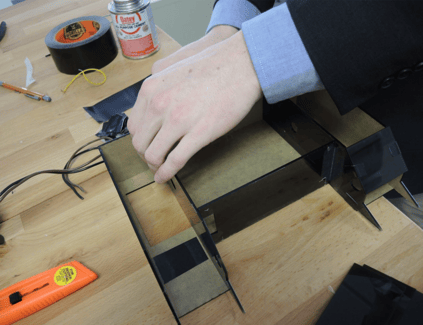
And that’s not even counting the hovercraft, quadcopter, robotic hand, and so much more, just in my one class block! So many of my classmates have had electronic and creative breakthroughs in this class, and watching my peers projects grow and develop next to mine has been remarkable.
The MakerLab is really an amazing and motivational learning environment. Electrical engineering has sparked the engineer inside of me, and has even made me consider it as part of my educational and occupational future. I can’t wait to see what is in store next semester as I take on Mechanical Engineering! Come check out the MakerLab: Maybe you’ll find your inner engineer, too!

